Milky Way rises by the East. Sagittarius on the left and Scorpius on the right.
Milky Way rises by the East. Sagittarius on the left and Scorpius on the right.
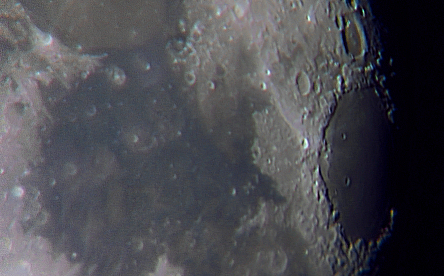
Near Bullialdus crater (at top-right side of the picture) there is a quite interesting region called Rimae Hippalus. Hippalus crater is the big one (left-center side of the picture). It is a big crater. In this image, shadows in this crater due to a low altitude sunlight creates a visual effect, as if a great creature had stamped his bare footprint in lunar soil. Do you see it?
Summer views of Milky Way are spectacular because the galaxy bulge is brighter and broader than its spiral arms visible the rest of the year. Located near Sagittarius and Scorpius constellations, the bright nebulae and dark lanes of the area creates a beautiful contrast in brightness and colors.
This picture is a 4-pane mosaic ensambled with free software Fitswork 4.40. Every pane is a 10 minutes exposition through a 55mm lens attached to a Canon EOS 450d (Rebel XSi) DSLR camera, mounted over a motorized equatorial mount, Sky Watcher EQ6.
A full resolution picture is available at AweSky
Aristarchus crater (Moon) with Meade Lightbridge 16 inch:
Aristarchus is a large impact crater on the Moon, is in the northwest of the nearside of the Moon. It is considered the brightest of the large formations on the lunar surface, its albedo is nearly double that of most other geographical spots. The crater is bright enough to be visible to the naked eye and is stunning when viewed through a large telescope. It is also easy to identify when most of the lunar surface is illuminated by reflection of light on Earth.
The crater is located on the southeast edge of the Aristarchus Plateau, an area that contains several high volcanic features, such as wrinkling rimes. This area is known for it have been detected in a significant number of transient lunar phenomena of nature as well as by recent emissions gas radon to be measured by the spacecraft Lunar Prospector.
I took a bunch of 30 seconds shots aiming M42 nebula as regular, in order to stack them later. Polar alignment was also regular, using EQ6 polar scope, probably not perfect.
I think M42 is a good target to measure periodic error in RA movement due to its near 0 degrees declination.
In order to show the drift, I stacked the shots without drift correction using a free software called startrails that gets the brightest pixels per shot, obtaining that way the best startrail you can achieve.
To measure the length of the drift, I requested a single shot solved plate from astrometry.net. They provide an exact width in arcminutes of the field. Then, I divide the width field by the width in pixels of my DSLR camera sensor, obtaining the resolution per pixel in arcseconds (a number close to 1 arcsecond/pixel for a 1,200 mm effective focal length telescope).
Then I measure the height of RA drift pattern with my regular post-processing free software, Fitswork4, and multiply that value by the previous resolution.
That is the way I have found that my EQ6 mount drifts around 40 arcseconds in RA movement. Dividing total exposure by the number of cycles (top peak to lower peak) I got the elapsed time needed to fulfill the periodic error: around 6 minutes long.
Mare Crisium is one of my favorite Moon areas. There is a lot of details inside Crisium, but it is not easy to detect, because it is very fine. High aperture telescopes are needed to spot the small impact craters inside this maria, because its typical lengths are 1 or 2 kilometers wide.
Near Mare Crisium there is another big area called Palus Somni (below), that is visible in this picture made with an amateur telescope. The big and bright crater in the middle is Proclus:
The telescope used is a Celestron Nexstar 5SE and the camera is a Canon EOS 450d (Rebel XSi) DSLR. The picture actually is a mosaic made of two panes.
On 2011-02-06 I took some videos of Jupiter and Saturn through a (4 inch) 102mm apochromatic refractor telescope. Applying Registax I got the results of the picture.
I’d like to share these two videos with anybody interested in playing with them:
http://www.mediafire.com/file/tqkri1z5z4pw8ge/Saturn-Takahashi-FS-102-F40-2011-02-06-divx.avi
http://www.mediafire.com/file/jbu38q5ucq9diwz/Jupiter-Takahashi-FS-102-F40-2011-02-06-divx.avi
This picture of North America Nebula (NGC 7000, a bright nebular region located in the Milky Way area of Cynus) was taken yesterday, 2010-11-03 under good transparency skies, using a 55mm lens and Canon EOS 450d, Rebel XSi and an EQ6 mount doing the unguided tracking. This is just one shot of 1380 seconds of exposition (23 minutes).
Postprocessing done using PSP9 and Fitswork4.
NGC 7000 is an emission nebula in the constellation Cygnus, near Deneb (α Cygni), also called the North American Nebula. The dark central region called the Gulf of Mexico, as in some astronomical plates for many years resembled that region of America.
Nebula NGC 7000 is the largest covering an area equivalent to the full moon, but its low surface brightness does not normally visible to the naked eye (though, in a dark, using a UHC filter can be seen without optical aid) NGC 7000 and the nearby Pelican Nebula (IC 5070) are part of the same interstellar cloud of ionized hydrogen (HII region). The dark area in the center is a very dense region of interstellar material in front of the nebula and which absorbs light of it, giving the group its characteristic shape.
It is not known with precision the distance that separates us from NGC 7000, neither the star responsible for the ionization of hydrogen that results in the emission of light. Supposing Deneb is the star that illuminates the nebula NGC 7000 then the distance to Earth is on the order of 1800 light years.
Capella is the brightest star in Auriga constellation. It is very easy to spot in the Northern hemisphere. It is a circumpolar star, very bright one. The picture has been taken through a 300mm telephoto lens and Canon EOS 450d over a Sky Watcher EQ6 equatorial mount.

Here it is the full frame, with a lot of stars in the field and great detail:
http://www.awesky.com/Deep+Sky/Misc/Capella+-+Alpha+Aurigae/
The Ring Nebula (also known as the Planetary Nebula M57, Messier 57, M57 or NGC 6720) is a prototypical planetary nebula in the constellation of Lyra. This is one of the most famous nebulae often used as an example of this type of astronomical objects. It is located at 0.7 kpc (2300 light years) from Earth and was discovered by Antoine Darquier de Pellepoix in 1779.
Their joint magnitude V-band (green filter) is equal to 8.80. Its real form is possibly a bipolar nebula seen with an inclination of 30 ° from its axis, and calculated that it has been expanding around 1600 years.
From their radial velocity, -19.2 km/s, it follows that approaches Earth more than 69120 km/h: this rate is caused by the combination of the sun’s orbital speed around the nucleus of the Milky Way and the speed of the Earth itself.
M57 is illuminated by a white dwarf at its center of visual magnitude 15.8.
This picture is a single shot of 30 seconds exposition through a SkyWatcher 6 inches refractor telescope at prime focus. Fitsworks4 was used to remove a bit the background noise.
This is a crop of the resulting stacking of 36x30s + 2x360s subframes taken this month in two different sessions. The area showed corresponds to M101 and surroundings (in Ursa Major), in which we find other 2 galaxies NGC 5474 and NGC 5477. Below, I have added a DSS2 image of the are for comparison. My stars are blobs, meanwhile DSS2 are pinpoint. On the other hand, I use to lose star colours specially in the brightest ones , when postprocessing and stretching histogram. Maybe some day I will learn how to fix all these errors …
I took last winter 92 shots of 30 seconds to M31 using my 300mm telephoto lens. An EQ6 equatorial mount holded the Canon EOS 450d (Rebel XTi) camera. After stacking them with DeepSkyStacker and some post-processing with PSP9, here it is the result. The imaga shows M32 and NGC 110 too. I hope you enjoy it:
The Tamron SP 54 is a 300mm telephoto lens, with an aperture of 54mm. I took a 60 seconds of exposition image of M42 in Orion. A few months later I took a 15 seconds image of the same field through a 6 inches Sky-Watcher non-apo refractor.
The comparison throws some interesting conclusions:
1.- A 150mm lens gives more resolution than a 54mm lens. Stars are fainter in the 6 inches refractor picture.
2.- The light captured by a 54mm lens in 60 seconds is nearly equivalent to the one captured by a 150mm lens in 15 seconds. Nebulosity appears practically equal in brightness in the two pictures. The lower image is a full frame, meanwhile the upper one is cropped at 25%.
Both images were taken using an unmodded Canon DSLR camera, EOS 450D (or Rebel XTi) and an EQ6 equatorial mount.
Here we see Andromeda galaxy as viewed from above. The spiral arms and structure becomes visible clearly in this processed image with a distortion nearly equivalent to a change of the observer location from our galaxy to a point in the void intergalactic space just above M31.
The original image from which this perspective has been obtained was a 4 minutes exposure with a 300mm telephoto lens and a DSLR Canon EOS 450d (Rebel XTi) camera.

Polaris has a close neighbor at 18 arcseconds that can be spotted easily through a telescope.

This is a 15 seconds exposure through a Meade Lightbridge 16-inch, a Dobson with no tracking, but fortunately Polaris moves very slowly through its small circumpolar path, due to its proximity to north pole in the sky. The camera used was a Canon EOS 450d, also known as Rebel XTi. The method employed was an eyepiece projection using a 14mm Meade Series 5000.
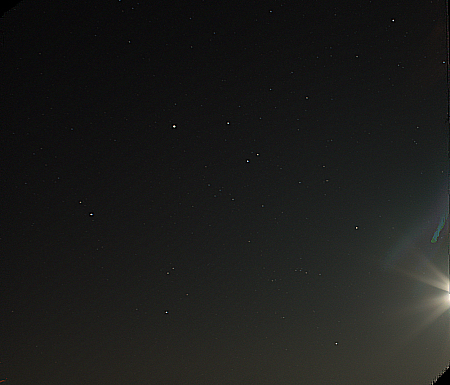
This is a set of 71 single shots of 10 seconds each one to the Auriga constellation on 2009-10-08. The Moon was located at its south and its brightness is visible on the edge of the image and on the background gradient. The single frames were recorded using a Canon Rebel XTi (EOS 450d) and a conventional EF 18mm lens. The Kids is a triangle of stars on the upper side of Auriga constellation.
In order to attach Tamron SP 54B 300mm telephoto lens to DSLR camera Canon EOS 450d (Rebel XTi) I used an adaptor found at ebay (Looking for “Tamron Adaptall 2 Lens To Canon EOS EF Mount Adaptor”). It works properly and it is very accurate when focusing to infinite. Pixco is the brand adaptor.

Tamron SP-54B 300mm is a telephoto lens built 30 years ago, oriented to analog reflex camera market. Thanks to a special adapter for Canon EOS DSLR camera, I could attach them each other and take some shots. The field of view and the magnification are very different to a conventional lens, like Canon EF-S 18-55mm.
Here it is a comparison image:

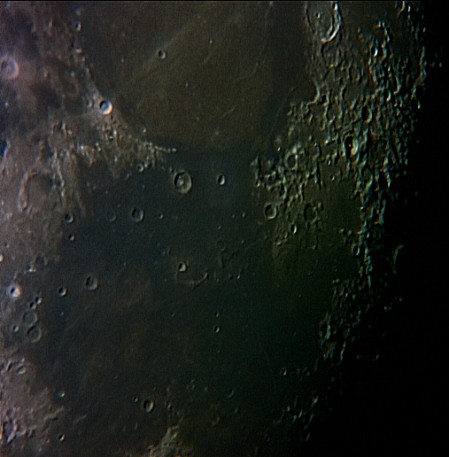
Color contrasts in the Moon are interesting even beautiful. The following picture shows Mare Tranquillitatis area and the southern part of Mare Serenitatis in full color. It was taken 4 days after full moon. The shadows in the terminator show the orography of the landscape. Mare Tranquillitatis seems to be mainly blue. This is due to its peculiar chemical composition.
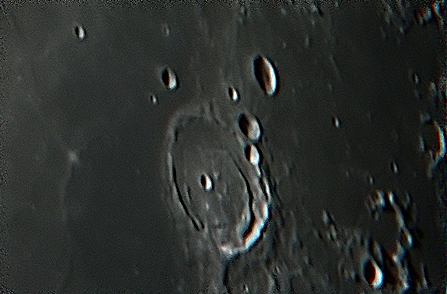
Pitiscus, Hommel, Ideler and Spallanzani are the only four craters of the picture with proper name. The rest of them are named by letter surnames like Ideler R or Ideler L. They are located in the South-East area of the Moon. The picture was taken on 2009-09-09 05h 20m U.T. and the terminator was passing across Pitiscus, Hommel, the two big and shadowed craters. Pitiscus is 85 km wide and Hommel is 129 km (76 miles). The smallest craters of the image are 7 km wide, that is 3.5 arcseconds, 1.75 arcseconds for the bright spot and 1.75 arcseconds for the shadow spot. Image detail could then be better for a 6-inch telescope (this is the equipment used to take the image, an scope capable up to 0.7 arcseconds of resolution). 622 subframes were recorded with the Manual-Crazy-Tracking system and stacked in Registax 5.

Posidonius is a big crater of the Moon on Mare Serenitatis. There is a lot of interesting details to observe inside: peaks, ridges, craterlets, … In the following image taken yesterday night, 4 km wide craters can be spot as small white points in the smooth surface of Mare Serenitatis.
Posidonius measures 95 km in diameter. The second biggest crater (a bit ghostly) in the picture is Chacornac, just below Posidonius. Inside it is visible a small craterlet called Chacornac A (it measures 5 km in diameter).
The third biggest crater of the picture is Daniell (31 km wide) located in the upper middle side. Its shape is not circular, but oval. This is the cause of a strange effect in perspective when comparing it with the craters nearby.
Dorsum Oppel is a wrinkle ridge of the Moon in Mare Crisium. 2 days after full moon is the best moment to observe it. It is a very large formation and the landscape along is quite impressive, full of small craters, tiny mountains and the smooth floor of Mare Crisium. It is important to reach a high magnification to enjoy the view (150x at least).
My setup is a 6-inch telescope, but I bet it is possible to observe it comfortably with a 4-inch refractor.
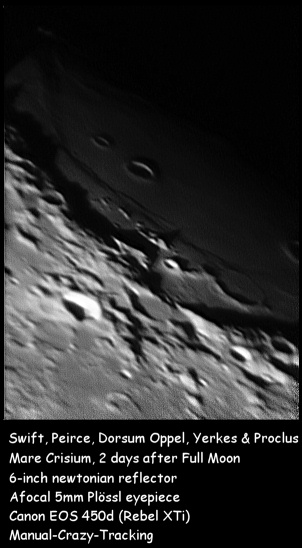
The bright and overexposed crater is Proclus. I have to work harder the dynamic range issue next time.
Swift and Peirce are the pair of craters in the upper side of the picture, near the lunar terminator. Below Peirce should be visible a 2 kms wide craterlet, but unfortunately my picture cannot yield such a resolution. According to a quick calculation, 3 kms is the smallest visible feature in theis image, and that corresponds to 1.5 arcseconds. A bit far still to the maximum theoretical resolution of a 6-inch telescope (that is around 0.7 arcseconds)
Yerkes is the big ghostly crater in the right side. Apparently there is a central peak in its center. I have been looking for a confirmation of the existence of that peak, but I haven’t found any reliable source where it is mentioned. Any hint here, I would be thankful…
Good seeing yesterday too (2009-08-27 23h05m UT). Wesley impact scar is fading day after day, but it is still there. I made an animation that shows Io approaching Jupiter’s limb: http://www.youtube.com/watch?v=78zJtv569y4

I have a good seeing last night. So I got my best Jupiter yet. Here it is:
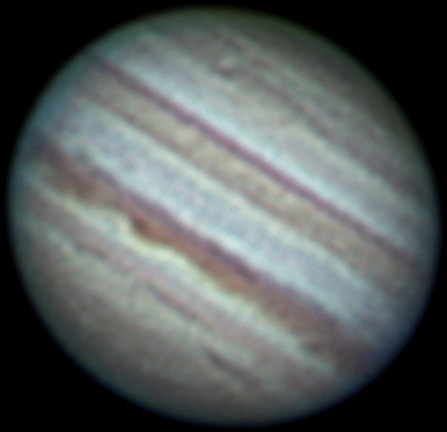
It is 4x resampled via Registax Mitchell and PS. After resampled I can spot more details in bands and polar zones.
As always I used the 6-inch no-EQ mounted newtonian reflector, the 14mm eyepiece doing afocal projection over the Canon EOS 450d (Rebel XTi) body and recording video using “EOS Camera Movie Record” free software. Three times Jupiter crossed over the field of view. Registax and VirtualDub added and stacked the footage properly.
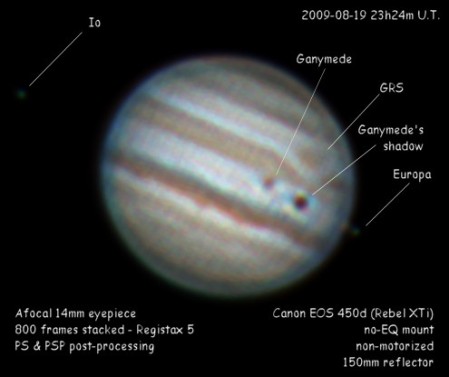
Yesterday night I had the chance to enjoy a multiple moon transition in Jupiter. Ganymede and Europa were crossing Jupiter and throwing their shadows to the big planet. Here it is an image of the event. At 23h 24m U.T Europa’s shadow was not visible yet. Io also appears at the photo but it was beneath the planet. In a minutes it would disappear.
The picture was taken with my digital reflex body (EOS Rebel XTi) and using the video capture software that converts it into a high quality webcam.
15th August 2009 was the day that Jupiter reached its closest position to Earth. Its apparent diameter was 49 arcseconds, so this is the best time to do planetary astrophotography with the giant planet. Using the afocal technique and a Canon EOS 450d body I took 2 video sequences and processed with Registax 5, Photoshop & Pain Shop Pro.
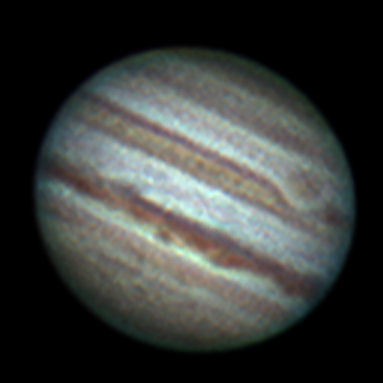
Several days ago a comet hit Jupiter leaving a dark spot near one of its polar regions. Today this spot is still visible with a powerful telescope. Maybe if I have a high power Barlow lens I could have observed it visually. But fortunately there exist astrophotography, a technique that lets you observer indirectly what you can’t spot directly through a telescope.
In this same picture I include a Jupiter from the day before yesterday. The lack of atmospheric turbulence gave me a chance to get closer to the maximum theoretical resolution of a 6-inch telescope.

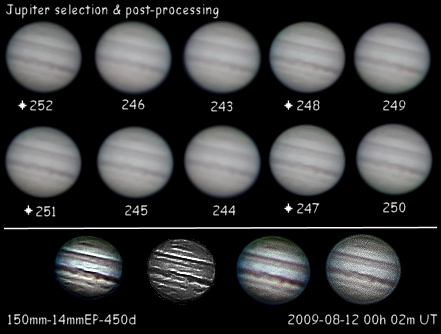
Yesterday I took several videos with Canon EOS 450d (Rebel XTi) to Jupiter through the no-EQ mounted 150mm reflector. The final effective resolution of every video is slightly different, depending on the weather conditions and the focus reached in this precise instant. So I have chosen the two best sequential videos and appended each other into one final with double frame size.
After selecting and appending, I used Photoshop to apply a hard sharpen, and several other filters getting different final results. Here they are.
Just some minutes ago.
Two days after full moon Mare Crisium shows a nice landscape of mountains and shadows. Some of its inner crates are visible in this picture. The small crater Swift is on the limit of visibility. The big impact called Proclus and its rays are remarkable.
To take this image I used the Canon EOS 450d, Rebel XTI DSLR camera recording video subframes and later I stacked them up with Registax 5. Some small tweaks on Paint Shop Pro 9 and ready.
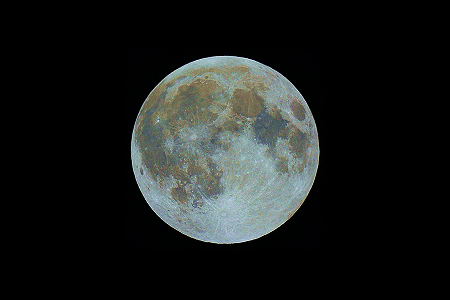
In order to catch the Moon, I took 4 single shots at prime focus through my 150/600 telescope. As I lack of a T-mount adapter I had to take them in handheld mode. After de-rotating them accordingly, I stacked them up with Registax 5 and removed the noise a little bit. I used the body camera Canon EOS 450d (Rebel XTi) at high resolution, low sensitivity (ISO 100) and high shutter speed 1/2000. This is the result after a blow up in saturation:
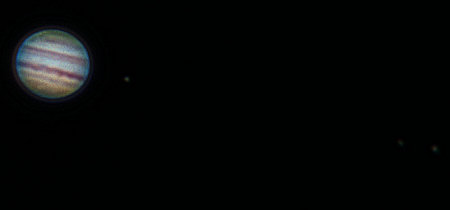
As Io passes in front of Jupiter, a big shadow is cast over the planet. In this picture I took tonight, it is clearly visible the dark point of shadow in the dead center of Jupiter. At its right a small spot that you may barely watch is Io.

In order to get a sharp image I used a Van Citter deconvolution process.
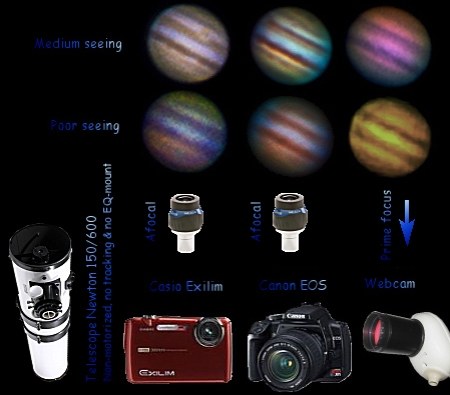
Here I have integrated my best images of Jupiter taken with 3 different cameras:
* Casio Exilim EX-FS10
* Canon EOS 450D (Rebel XTi)
* Webcam Philips ToUcam Pro
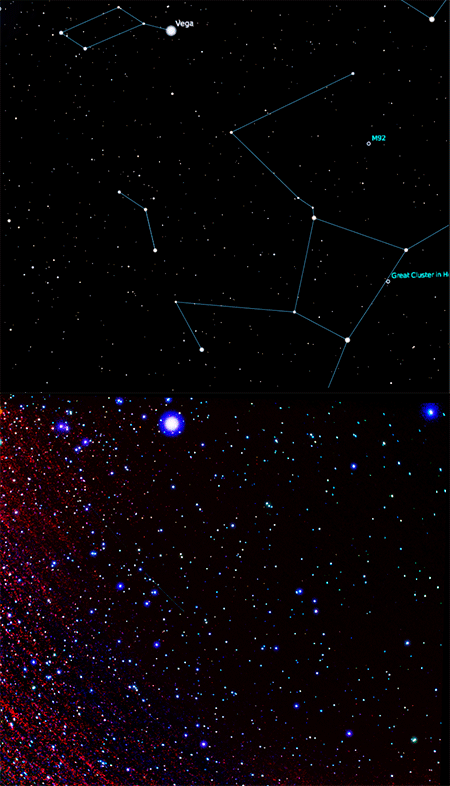
Last night Lyra and Hercules were located near the zenith of my suburban sky, so I could make a series of 90 shots with 10 seconds of exposure each one. My equipment was the DSLR camera Canon EOS 450 (Rebel XTi). This image sequence is equivalent to a 15 minutes long single shot. After adding them with the shift-and-add technique, and substracting a dark frame (via Photoshop) that includes light pollution I got a final picture. I have aligned (using Nebulosity 2 software) the Stellarium map of the area and created an animated gif that switchs from the photo to the map continuously. It seems every star is located correctly where it should be 😉
Globular clusters M13 and M92 are there in the photo like 2 stars.
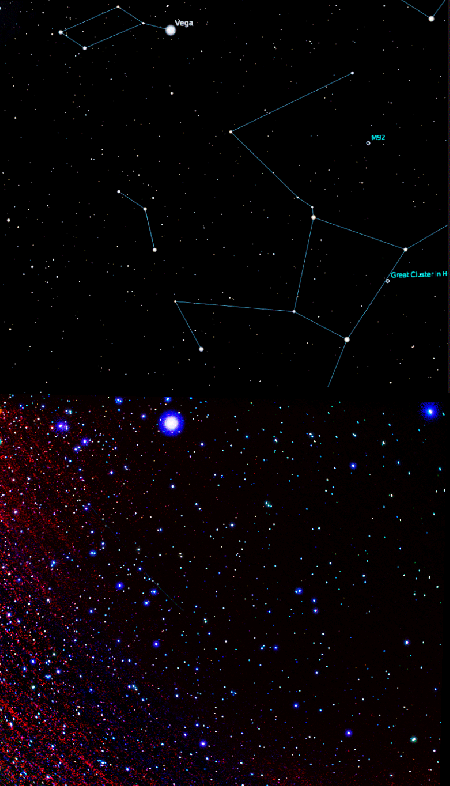
Light pollution in suburban skies makes nearly impossible astrophotography. Nevertheless, there exists some computer techniques to make it possible. I have used a dark frame to catch the exact pattern of the light pollution in the photographed area. The way to accomplish this is not difficult. Shooting in continuous mode the DSLR camera facing the zenith in my home window, and forcing every frame to last 15 seconds I got a sequence of subframes to be processed afterward.
To get the dark frame I do some image arithmetic with Paint Shop Pro 9: I choose 3 or 4 distant subframes and compute them using “darkest” option. This way, stars become to fade until disappearing.
With Paint Shop Pro 9 and batch processor I apply a barrel lens distortion of 17 (empirical value to correct a 18mm focal lens like Canon’s) to every subframe and also to the dark frame.
Once got the dark frame DeepSkyStacker is needed to stack the single subframes and substract the dark frame. The sideral drift of the field is automatically compensated with the intelligent algorithm that DeepSkyStacker provides.
The resulting image is surprising taking into account this is an urban sky.

This image was taken in the center of a light polluted city with almost 1 million inhabitants. Using a dark frame of the polluted sky I could catch the Milky Way. Obviously it was impossible to observe it with naked eye.
The image is the result of adding 20 subframes of 15 seconds of exposure each one at ISO 1600. After applying a barrel distortion filter to compensate lens distortion the images become integrable. Using Nebulosity 2 software I could compensate the sideral motion of the sky.
The quality of the image is very low. The point here is not quality but the successful of avoiding light pollution in a widefield Milky Way shot. The area corresponds to the border of Lyra constellation towards Aquila constellation.

Someone asked: “Has anyone had difficulty focusing a DSLR to a LightBridge? I bought the appropriate adapters but cannot focus on any subject. It would seem that the LightBridge focuser extends too far away from the secondary. It seems the obvious answer is to install a focuser with less length. ”
Yesterday I was also trying to focus my DSLR Canon EOS Rebel XTi (EOS 450d) through my Meade Lightbridge 16″, but it was not possible. I haven’t still bought any T-adapter, because I was not sure it could reach the focus. Indeed it doesn’t reach it even without any adapter.
Maybe changing the focuser to a zero profile one could work. Or maybe not.
There is a trick to find out where the focal plane is exactly. When seeing the Moon, remove any eyepiece from the focuser and project the light into a cardboard perpendicular to the focuser axis. When the Moon gets clear and focused, there it is exactly located the focal plane at prime focus.
Knowing the distance from the CCD camera to the T-adapter it is possible to find out if a low profile focuser could reach the focus for prime focus astrophotography.
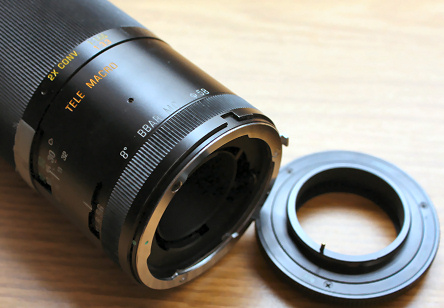
I am trying to engage an old telephoto 300mm Tamron SP lens into my Canon EOS 450d (Canon Digital Rebel XSi), but I haven’t been able to find any adapter in the market. The exact model of my lens is “Tamron SP 54B 300mm F:5.6”. Respecting the mount, I have an ancient adapter for my old analog reflex Praktica. The lens has a bayonet mount, and the adapter translates it into a screw-threaded mount. In both bayonet and screw mounts there is a brand name: “Adaptall 2”.
Someone has told me to buy a “M42 to EOS adapter”, but I am not sure if engaging two adapters in serial, would let me focus infinity afterward.
So, I am looking for an adapter that let me match correctly this telephoto lens to my Canon EOS 450d. Here is a picture showing the mount and the old adapter. Any hint would help me for sure.
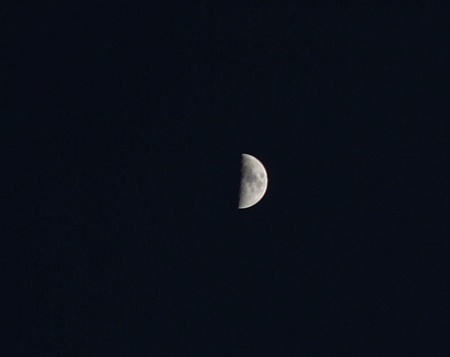
This is a picture of the crescent Moon taken with the DSLR camera Canon EOS 450d and their most standard lens kit: EF-S-18-55mm.
Zoom at maximum, that is 55 mm of focal length. No tracking, only static tripod to avoid blur.
I hope you like it …
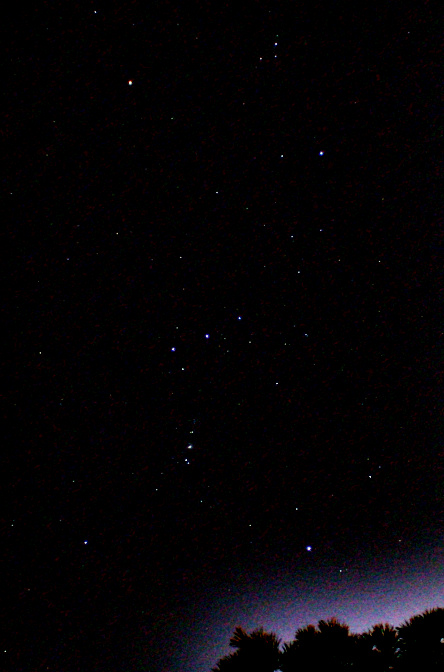
Orion constellation may be difficult to sight in Spring due to its low altitude near the bright west horizon at dusk. Nevertheless I took one subframe of 8 seconds of exposition under ISO-400 applying my new Canon EOS 450d plus 18-55mm lens.
With Paint Shop Pro I subtracted the background gradient due to dusk light. There is visible a pine branch below.
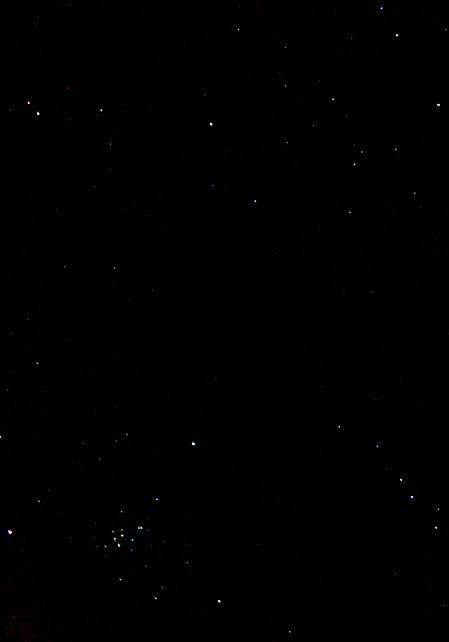
I have recently bought a DSRL camera: Canon EOS 450D. Today it has shot for the first time to the stars. Beehive cluster was an easy target tonight. The maximum zoom the lens permits let us separate some of the components of the M44 cluster. The resulting image has been made of ten shots of 5 seconds of exposition each one.
