Archive for Jupiter

Jupiter through a 10 inch Mewlon telescope

Posted in Astrophotography with tags , , , , , , on 2013/02/09 by computerphysicslab
Tonight I’ve enjoyed observing a visual of Jupiter through a Mewlon 250. Although there was turbulence, it was worth. I had never seen a Jupiter so detailed by telescope. I could depict up to four bands, the great red spot and both polar icecaps. Inside bands I  could see small details as well. Also it has showed up Jupiter’s satellite Europa at its limbo during the observation.

I’ve got the best visual results without barlow, only using  a 15 mm (200x magnification) eyepiece. When using a barlow 2x, obtaining 400x magnification, details were not so easy to detect.

The telescope is a reflector Takahashi Dall-Kirkham at f/12, yielding 3 meters of focal.

I have also realized that when sit down in a chair and keeping the vision of the planet during several minutes trying different focus, the eye eventually adapts to the brightness of the planet and increasingly captures more details.

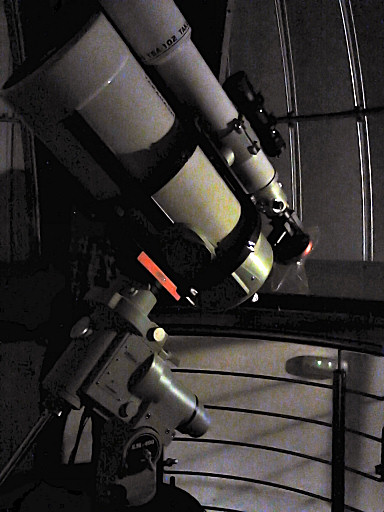
Here it is a picture of the setup:

Mewlon Setup

Sharing raw footage of Jupiter and Saturn

Posted in Astrophotography with tags , , , , , , , , , , , on 2011/02/11 by computerphysicslab

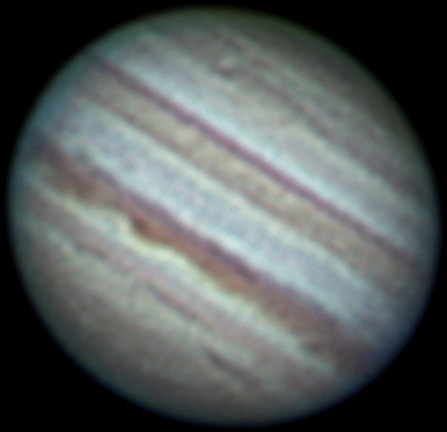
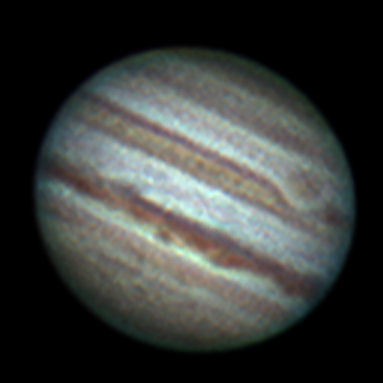
On 2011-02-06 I  took some videos of Jupiter and Saturn through a (4 inch) 102mm apochromatic refractor telescope. Applying Registax I got the results of the picture.

I’d like to share these two videos with anybody interested in playing with them:

http://www.mediafire.com/file/tqkri1z5z4pw8ge/Saturn-Takahashi-FS-102-F40-2011-02-06-divx.avi

http://www.mediafire.com/file/jbu38q5ucq9diwz/Jupiter-Takahashi-FS-102-F40-2011-02-06-divx.avi

Fringe color filter – Achromatic refractor

Posted in Astrophotography with tags , , , , , on 2010/12/12 by computerphysicslab
Chromatic aberration of a convex lense
Image via Wikipedia

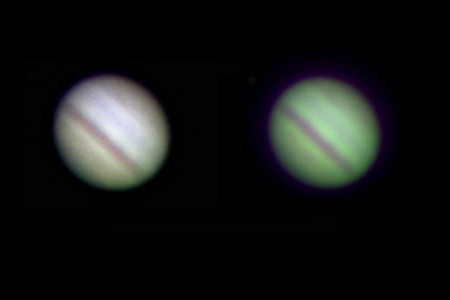
Fringe color filters are able to cut almost completely the secondary spectrum on images taken through telescopes that yield chromatic aberrations, like an achromatic refractor.  Here is an example of the difference between an picture of Jupiter taken through a fringe color filter (left) and a similar picture taken without that filter (right).

Jupiter 2010 Opposition

Posted in Astrophotography with tags , , , , , on 2010/10/03 by computerphysicslab

Currently, Jupiter is at its minimum distance from Earth, which does not happen since 47 years. While the largest planet in the solar system can always be spotted with the naked eye, this time will look brighter.
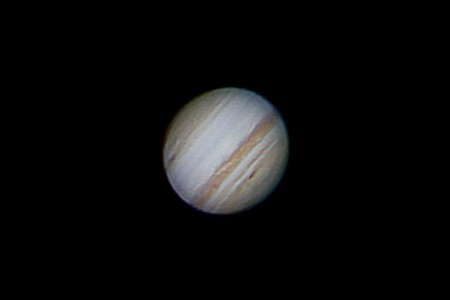
The phenomenon is called opposition, and occurs when a planet is located exactly opposite to the Sun in the sky, meaning, the same side of Earth’s orbit about the sun. In such cases, the distance between the two planets is minimal. The oppositions between Earth and Jupiter occur every 13 months.

However, as the orbits of both planets are not perfectly round nor perfectly concentric, these approaches are not always the same. There is a “better” and a “worse” opposition. And the gap between the two planets varies from 591 to 676 millions of kilometers. Consequently, the brightness and apparent size of Jupiter also varies.

The current opposition of Jupiter is excellent, with the planet at nearly 592 million of kilometers from Earth. Equivalent to about 1,500 times the distance to the Moon, but Earth and Jupiter can not get much closer than that. The last time Jupiter was so close to Earth in October 1963 was 47 years ago. And it will not happen again until September 2022.
My Jupiters at ALPO

Posted in Astrophotography with tags , , , , , on 2010/09/28 by computerphysicslab

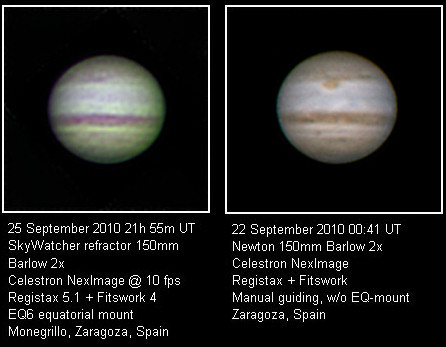
ALPO has a webpage where people around the world uses to post their best planetary images. Recently I got two pictures of picture through a Newtonian and through a refractor telescope. ALPO webpage published my pictures at these URLs:

http://alpo-j.asahikawa-med.ac.jp/kk10/j100925z.htm
http://alpo-j.asahikawa-med.ac.jp/kk10/j100922z.htm

And these are the images:

Manual Crazy Tracking

Posted in Astrophotography with tags , , , , , , , , , on 2009/09/01 by computerphysicslab

Lacking of an equatorial mount I have built myself a kind of manual tracking system that keeps into the field of view of a webcam a planet like Jupiter, for 3 minutes. This is long enough to record useful data and then post-process it with aggressive wavelets.

The resulting tracking is not at all perfect. You may see Jupiter swinging around the screen. It is important to capture the data at a fast shutter speed (1/100 sec.) to avoid motion blur in every frame because the planet is always dancing.

In spite of this movement, the results after stacking are very good. Here I show this really simple system and the resulting yesterday’s Jupiter with the webcam:

Manual-Crazy-Tracking-01

Manual-Crazy-Tracking-02

Manual-Crazy-Tracking-03

As you can see the Manual-Crazy-Tracking is a very simple system that consists in a rubber band attached to the tripod handle. If you try to track manually directly pushing the tripod handle, the shaking is excessive and you would need a very very fast shutter speed to get some useful data. The rubber band is necessary to reduce vibrations and increase the shift movement control.

At beginning Jupiter is located in the center of the field of view with no need to any corrections. As long as it drifts due to its sidereal movement you will have to pull using the rubber band in order to keep it in the center of the screen (it is supposed you have a laptop there capturing and showing images from the webcam). This way you may have Jupiter centered in the screen for a long time. You will have time to focus (left hand pulling the rubber band and right hand tweaking the focuser) and time to expose.

Jupiter, Io & Wesley impact scar

Posted in Astrophotography with tags , , , , , , , , , , , , , on 2009/08/28 by computerphysicslab

Good seeing yesterday too (2009-08-27 23h05m UT). Wesley impact scar is fading day after day, but it is still there. I made an animation that shows Io approaching Jupiter’s limb: http://www.youtube.com/watch?v=78zJtv569y4

Jupiter-Io-Wesley-impact-2009-08-27-23h05m-UT

Big Jupo

Posted in Astrophotography with tags , , , , , , , , , , , , , , , , , on 2009/08/27 by computerphysicslab

I have a good seeing last night. So I got my best Jupiter yet. Here it is:

Jupiter 2009-08-26 Sharp

It is 4x resampled via Registax Mitchell and PS. After resampled I can spot more details in bands and polar zones.

As always I used the 6-inch no-EQ mounted newtonian reflector, the 14mm eyepiece doing afocal projection over the Canon EOS 450d (Rebel XTi) body and recording video using “EOS Camera Movie Record” free software. Three times Jupiter crossed over the field of view. Registax and VirtualDub added and stacked the footage properly.

Ganymede’s shadow

Posted in Astrophotography with tags , , , , , , , , , , , , , , , , on 2009/08/20 by computerphysicslab

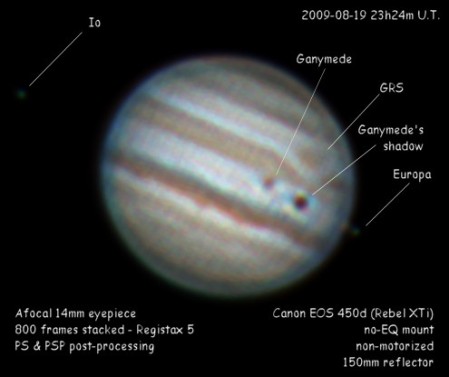
Yesterday night I had the chance to enjoy a multiple moon transition in Jupiter. Ganymede and Europa were crossing Jupiter and throwing their shadows to the big planet. Here it is an image of the event. At 23h 24m U.T Europa’s shadow was not visible yet. Io also appears at the photo but it was beneath the planet. In a minutes it would disappear.

The picture was taken with my digital reflex body (EOS Rebel XTi) and using the video capture software that converts it into a high quality webcam.

Jupiter-eclipse

Jupiter Opposition

Posted in Astrophotography with tags , , , , , , , , , , , , , on 2009/08/17 by computerphysicslab

15th August 2009 was the day that Jupiter reached its closest position to Earth. Its apparent diameter was 49 arcseconds, so this is the best time to do planetary astrophotography with the giant planet. Using the afocal technique and a Canon EOS 450d body I took 2 video sequences and processed with Registax 5, Photoshop & Pain Shop Pro.

Jupiter-2009-08-15-00h12mUT-150mm-EP14mm-450d-2videos-3x

Wesley impact scar

Posted in Astrophotography with tags , , , , , , , , , , , , on 2009/08/16 by computerphysicslab

Several days ago a comet hit Jupiter leaving a dark spot near one of its polar regions. Today this spot is still visible with a powerful telescope. Maybe if I have a high power Barlow lens I could have observed it visually. But fortunately there exist astrophotography, a technique that lets you observer indirectly what you can’t spot directly through a telescope.

In this same picture I include a Jupiter from the day before yesterday. The lack of atmospheric turbulence gave me a chance to get closer to the maximum theoretical resolution of a 6-inch telescope.

Jupiter 2009-08-15-and-16 150mm-EP14mm-450d

Jupiter selection & post-processing

Posted in Astrophotography with tags , , , , , , , , on 2009/08/12 by computerphysicslab

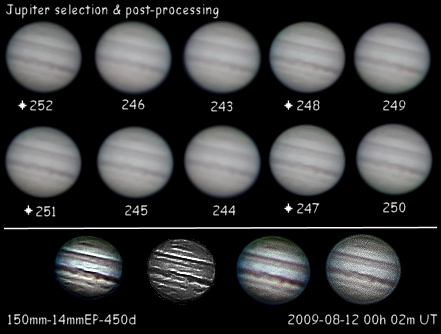
Yesterday I took several videos with Canon EOS 450d (Rebel XTi) to Jupiter through the no-EQ mounted 150mm reflector. The final effective resolution of every video is slightly different, depending on the weather conditions and the focus reached in this precise instant. So I have chosen the two best sequential videos and appended each other into one final with double frame size.

After selecting and appending, I used Photoshop to apply a hard sharpen, and several other filters getting different final results. Here they are.

Jupiter-selection

Jupiter & 3 moons

Posted in Astrophotography with tags , , , , , , , , on 2009/08/12 by computerphysicslab

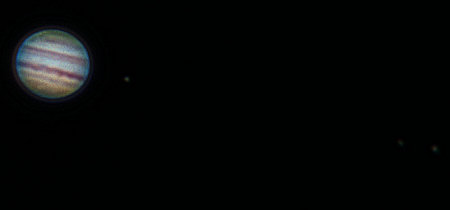
Just some minutes ago.

Jupiter-amd-3-moons

Registax & post-processing

Posted in Astrophotography with tags , on 2009/08/09 by computerphysicslab

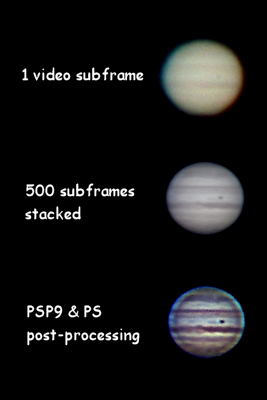
Computer assisted planetary and lunar imagery has reached the backyard amateur astronomer. With just a computer, a bunch of free software from Internet and a telescope (or even binoculars) and a point & shoot digital camera you will own the basic setup to do interesting astrophography jobs, mainly in the solar system realm.

The information obtained from a sensor device is pretty blurry, lacking of contrast and noisy as hell when shooting through a telescope or some other instrument with magnification. Atmosphere also conspire against us, because actually it is not as invisible as we thought at first. Windy nights or thermal issues may spoil our footage. That’s way disappointing. But there is a big pro when computer assisted image restoration shows up.

Here it is an example. Jupiter as recorded with a 6-inch telescope. Second step is the result of applying Registax 5 to the sequence. And step 3 is the final touch of sharp, color and contrast enhancement in Photoshop or any other similar software.

Jupiter-processing

Io’s shadow over Jupiter

Posted in Astrophotography with tags , , , , , , , , , , on 2009/08/05 by computerphysicslab

As Io passes in front of Jupiter, a big shadow is cast over the planet. In this picture I took tonight, it is clearly visible the dark point of shadow in the dead center of Jupiter. At its right a small spot that you may barely watch is Io.

Jupiter-Io-shadow

In order to get a sharp image I used a Van Citter deconvolution process.

Jupiter occultation of 45 Cap

Posted in Astrophotography with tags , , , , , , , , , , , , on 2009/08/04 by computerphysicslab

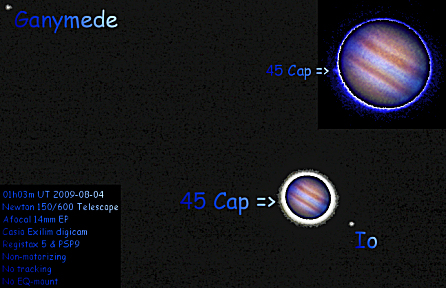
Jupiter occultation of 45 Cap tonight:

Jupiter-occultation-45 Cap

Jupiter with Exilim, 450d & Webcam

Posted in Astrophotography with tags , , , , , , , , , , , , , , , , , on 2009/08/03 by computerphysicslab

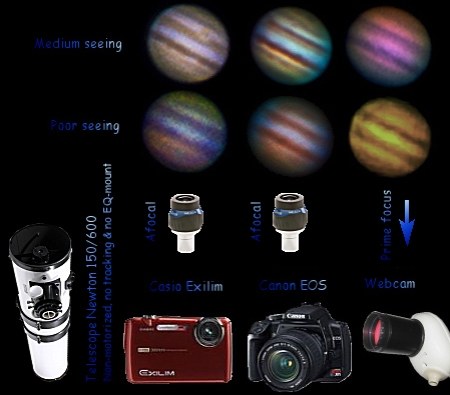
Here I have integrated my best images of Jupiter taken with 3 different cameras:

* Casio Exilim EX-FS10

* Canon EOS 450D (Rebel XTi)

* Webcam Philips ToUcam Pro

jupiter-exilim-450d-webcam

Voyager I vs. Newton 150/600

Posted in Astrophotography with tags , , , , , on 2009/07/30 by computerphysicslab

Trying to find out which are the best colors and contrast to apply to a Jupiter I have come out with this comparative picture, between what Voyager I spacecraft could see and what I could spot last night with my humble newtonian telescope.

Jupiter-comparison

Jupiter post-processing

Posted in Astrophotography with tags , , , , , , , , , , , , on 2009/07/29 by computerphysicslab

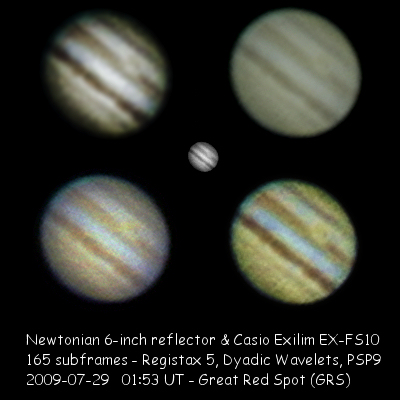
I have been lucky tonight. Good seeing to see Jupiter. Using a small binoculars between the eyepiece and my eye I could spot visually Jupiter in high definition at an effective 450x magnification. That’s pretty good for a 150/600 reflector, isn’t it?

As you may appreciate in the following picture, the GRS (Great Red Spot) is clearly visible near the center of the planet. Several details are visible in the Jupiter’s bands. The image was obtained with a non-tracking Newtonian 6-inch telescope, a 14mm eyepiece, a Casio Exilim EX-FS10 digital camera that recorded 165 subframes. Registax 5 dealt with the alignment and stacking process. Dyadic Wavelets were applied to get contrast and details. PSP9 did the post-processing. The footage was taken exactly at 2009-07-28 03:33 UT.

Here several post-processing results are shown. The first one is that I like more.

Jupiter-2009-07-29

Jupiter, Europa & Ganymede

Posted in Astrophotography with tags , , , , , , , , on 2009/07/28 by computerphysicslab

Here it is, Jupiter, Europa & Ganymede.

Jupiter-Europa-Ganymede

My best Jupiter so far

Posted in Astrophotography with tags , , , , , , , , , , on 2009/07/26 by computerphysicslab

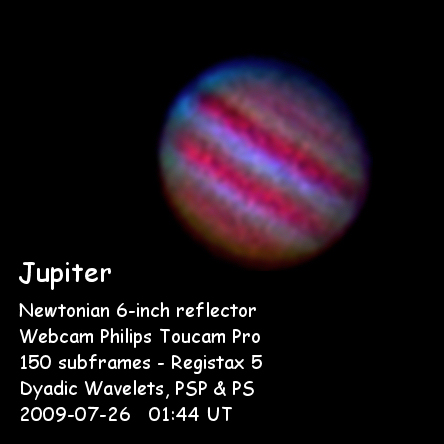
My 6-inch reflector working over a photographic tripod, and a webcam recording the focal plane. This is the resulting image, once overprocessed, yes, I give you that.

With Registax 5 I stacked 150 subframes and then applied dyadic wavelets. Some retouching with Paint Shop Pro 9 and fractal zooming under Photoshop.

The footage corresponds to 2009-07-26 at 01:44 UT.

Jupiter-150mm-barlow2x-webcam

Webcam astrophotography

Posted in Astrophotography with tags , , , , , , , , , , , , on 2009/07/24 by computerphysicslab

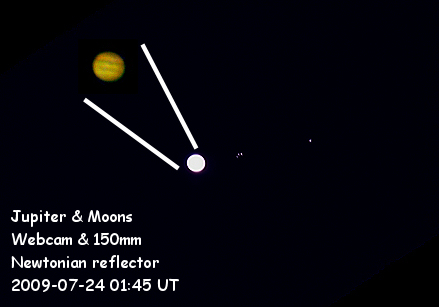
Tonight I have been able for the first time to use a webcam for doing astrophotography. The best up of it is the possibility to get a sharp focus looking at the laptop screen while correcting the focus. Besides, the resolution seems to double that of my digital pocket camera with the afocal technique. Up to now I haven’t got full resolution of 640×480 with my webcam, a Philips Toucam Pro (PCVC 740K). The drivers for XP are very naughty. I can only record 320×240 frames so long.

The down is the small field of view because the CCD sensor has not so many pixels like a digital camera. To find the target with a non-tracking mount is difficult. Here we see a prime focus shot that shows the Galilean moons and a Barlow 2x show showing the horizontal bands of the planet.

webcam-jupiter-320x240-01

Jupiter’s galilean moons

Posted in Astrophotography with tags , , , , , , , , , , , on 2009/07/22 by computerphysicslab

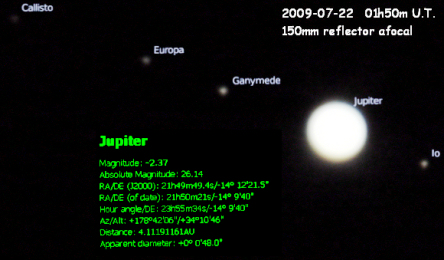
Galilean moons are very easy to observe using some kind of instrument to get some magnification. With just a binoculars would be enough to spot the four moons of Jupiter. They are constantly rotating around Jupiter. Every day their relative distances and positions changes. Their names are Io, Callisto, Europa & Ganymede. They all have a similar size and brightness. When passing in front of the big planet, they cast a shadow over the gaseous surface of Jupiter. It is required a telescope to observe such events.

Here it is a picture I took tonight with a digital pocket camera through a 14mm eyepiece and a 150 mm newtonian reflector telescope with no-tracking system.

Jupiter-Galilean-Satellites